|


|
|
Timing
Chain Replacement on 1995 2.0 16v
Many owners of the Scorpio are worried about the longevity of the timing
chain(s) and the matter is discussed elsewhere on the site. I could get no
absolute answer on when, if ever, to change the chain so decided to carry out
the job as a precautionary measure. My car has an incomplete service history and
I think the mileage is a little suspect, as a final deciding factor it was
obvious that it has missed at least one or more oil changes before I got it
which can be really bad news for overhead and multi cam engines. Anything I
could do to improve matters would help in the longer term.
A good description of the work required for the 2.0 16v is given in the Haynes
Granada manual (it was also fitted to the Ford Escort RS2000) and worth reading
before beginning; reference to the manual will make sense of my text.
I purchased the parts before starting; some from Ford and others from QES engine
parts suppliers. I bought a non Ford timing chain which was a mistake given the
extra cost but used a Ford chain on the oil pump and Ford parts elsewhere. The
only special tools required are a good two or three-legged puller for the
crankshaft pulley a socket set and a Torx socket set.
The place to start is removing the air filter pipes and the air box chamber from
the front of the engine area which gives good access to the main area of work.
Make sure you unplug the air temp sensor from the top air pipe before pulling it
away and don’t forget to disconnect the battery, just in case.
Next I chose to remove the drive belt by putting a 15mm socket on the tensioner
pulley bolt and using a long socket bar to de-tension the belt and remove. There
is no need to remove the tensioner device or the alternator as the manual
suggests.
Remove the engine belly pan. The next job of loosening the crankshaft pulley
requires two people to carry out. On manual cars it is just a case of putting
the car in gear to lock the crankshaft but on the autos need to remove the
starter motor to lock the starter ring gear. There are three 13mm bolts that
hold the starter motor and another that holds steady bracket. Jack up the car
and make it safe crawl underneath and undo the bolts. I found for the top bolt I
had to use two 10 inch and one 4 inch extension bars so that I could get enough
room to swing the socket ratchet at the front end of the engine bay. You also
have to remove another 13mm engine to g/box bolt above the starter to release
the wiring loom retaining clip and of course the support bracket bolt. You can
leave the starter wiring in place as you have of course disconnected the
battery. Get your helper to put a socket on a long bar and while you carefully
jam the starter gear ring gear with a large screwdriver or similar have them
undo the crankshaft pulley nut from above. It may need the extra persuasion of a
large mallet.
Back to the top of the car remove the spark plug cover and the coil packs, also
disconnect the camshaft position sensor plug and the engine breather pipe. Then
you can undo the four 10mm bolts on the corners of the cam cover and the other
8mm bolts before finally lifting away the cam cover. I loosened totally all the
spark plugs for ease of turning over the engine by hand but left them in place
to stop debris getting into the bores. It’s not a bad idea to stick some clean
rag or tissue into the plug access holes too.
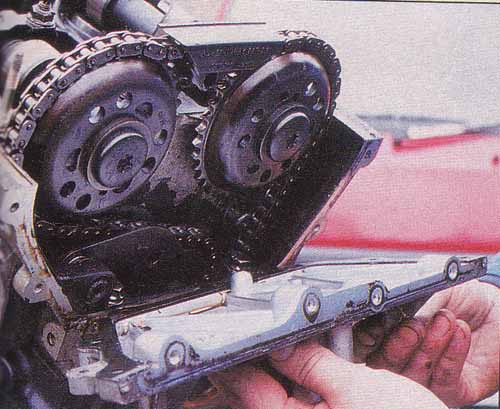
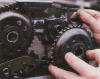
I then removed the top front of the timing chest to reveal the tensioner
assembly, followed by the crankshaft pulley. You will almost certainly need a
decent puller for the pulley as it is a tight fit on the shaft but there is no
need on the 2.0 Scorpio to remove the radiator or fans as suggested by the
manual (but use the smallest/shortest puller you can find to avoid this job)
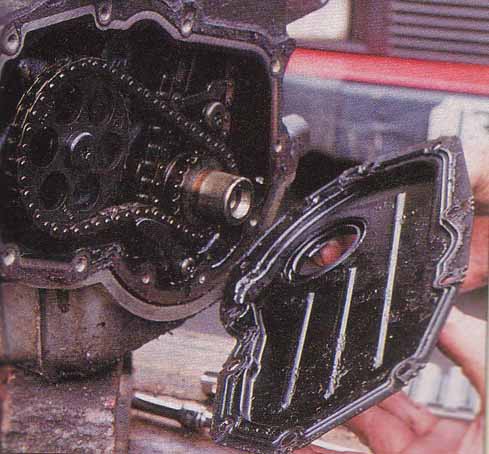
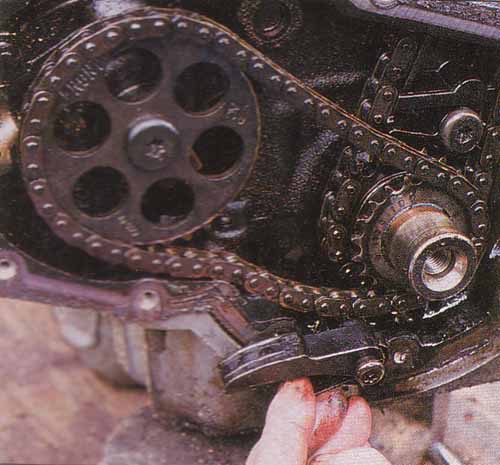
The lower chain cover bolts and cover can then be removed along with the
woodruff key from the crankshaft, which again should be a tight fit so carefully
remove with a screwdriver and knockometer (hammer).
You can now undo the Torx bolt of the oil pump chain tensioner and the oil pump
sprocket after which the oil pump chain and tensioner/spring can be removed.
Do not remove anything else at this time until you understand the timing
reference marks on the camshaft sprockets, the crankshaft sprocket and the
chain. Put the crankshaft bolt (but not the pulley) back in place and using a
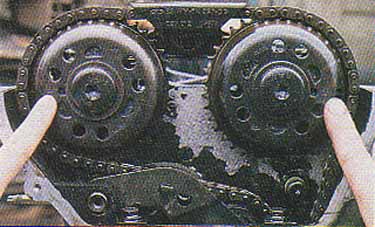
spanner turn the engine over by hand. Ford chains have gold coloured links which
aid the timing process greatly, two for each cam sprocket and one for the crank
sprocket. The timing marks on the cam sprockets fall slightly below horizontal
(slightly more so on the nearside cam) when the crank sprocket mark is pointing
straight down and all the links are lined up. If unsure make you own marks with
felt tip as I did.
When you are happy that you can retime everything undo the cam sprocket Torx
bolts by either locking them with a screwdriver through the holes or put a set
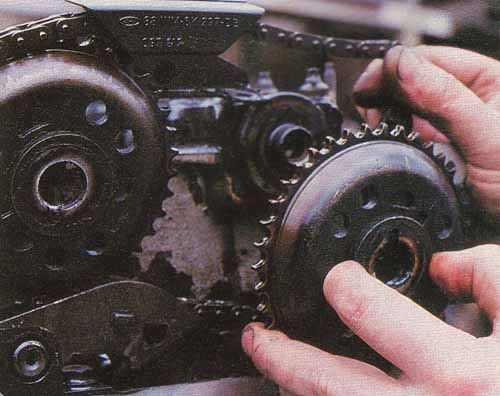
of grips on the camshaft (not the lobes!) and remove the sprockets. Next loosen
the two Torx bolts of the timing chain guide, which can be carefully removed
upwards past the chain. Remove the pulley bolt again and slide the crankshaft
sprocket forward on the shaft and remove the chain, remove the sprocket and then
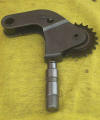
lift the chain upwards and out of the timing chest. Carefully remove the circlip
of the tensioner sprocket assembly shaft and the spring/hydraulic tensioner
underneath.
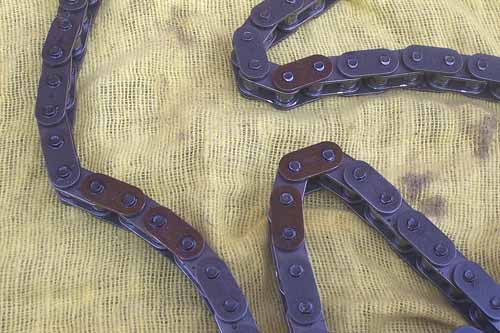
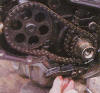
I did not purchase an original Ford timing chain so it did not have the gold
links. To make thing easier I took a few minutes to count the links of the old
chain and mark the new one with felt-tip that helped later.
On examination none of the components were adversely worn although all the chain
rollers were slightly pitted and the tensioner plunger was towards the end of
its travel.
All you have to do now is put all together again. Starting with the timing chain
and the long guide, slide the chain into the guide and slide both into the
timing chest and fit the top bolt loosely. Next find the single gold link and
fit the bottom sprocket into place on the chain and then slide the sprocket back
onto the crankshaft. Note that there is a lug on the back of the sprocket, which
fits, into a corresponding notch on the crankshaft. Refit the crankshaft pulley
bolt and get your helper to turn the engine clockwise until the timing mark is
pointing straight down while you guide the chain. Fit the bottom bolt of the
long tensioner (I used threadlock on all internal bolts) Loosely fit the
nearside camshaft pulley ensuring the chain is taught and the marked tooth is
between the two right hand gold links. You may have to put a pair of grips on
the camshaft to turn the shaft so that the sprocket can be aligned with the
chain links, now nip up the sprocket bolt and do the same with the offside
sprocket.
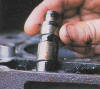
Next drop in a new tensioner device and fit a new tensioner sprocket assembly
(Always replace this as it would seem to be a possible point of wear and
consequential failure) refit the circlip. To be safe you can now turn the engine
by hand again, clockwise only, to check, everything lines up correctly and none
of the valves are hitting the pistons etc. Once you are happy you can release
the clip on the tensioner/plunger as the tensioner comes compressed. The manual
suggests that a special tool may have to be made from stiff wire but I found I
could slide the tensioner sprocket back on its shaft and use the tip of a small
screwdriver, press down and release until the top of the tensioner pops up. As a
final check turn the engine by hand again but note the tensioner will not be
operating properly yet until it has filled with oil so expect the chain between
the camshaft sprockets to go tight and then loose as the lobes go over centre on
the tappets.
The rest of the job is just a reversal of the stripping procedure. Use a new
crankshaft oil seal every time. The rest of the gaskets are high quality and
should be good to re-use unless damaged. Use a new crankshaft bolt, as it is a
stretch bolt also fit a new top chain guide between the camshaft sprockets.
Before replacing the cam cover I poured engine oil over the new components so
they didn’t have a dry start-up
Once all is back together start the engine and let it idle. It will probably be
very noisy until the tensioner/plunger fills with oil and locks up, this will
take quite a few minutes so don’t rev the engine until it quietens down.
The whole job will take a steady days work if you plan ahead.
Despite all the controversy about timing chains I now have peace of mind and
feel happy that mine is good for many thousands of miles before needing
replacement again, if ever.
Parts Replaced
| Timing Chain |
£62.00 |
| Oil Pump Chain |
| Tensioner/Plunger |
| Crankshaft Oil Seal |
£7.31 |
| Side Timing Chain Guide |
£7.49 |
| Top Timing Chain Guide |
£2.40 |
| Oil Pump Chain Guide |
£1.97 |
All torque settings can be found in the Haynes Granada Manual
|
|
Photographs - click on them for larger images |
Removing the Lower Casing |
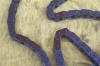
The new Chain |
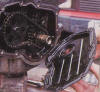
Removing the Upper Casing |
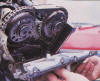
Aligning the Sprockets |
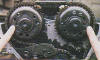
Removing the Sprockets |
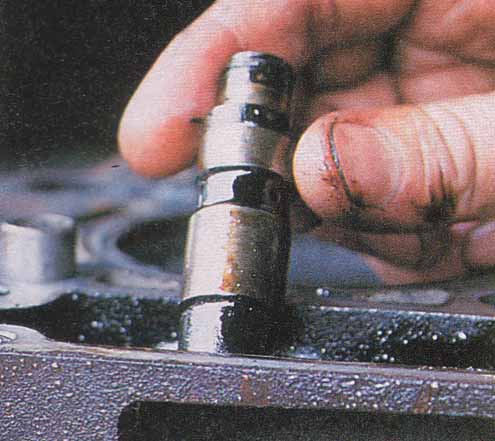
Oiling the Tensioner |
The Tensioner Plunger |
|

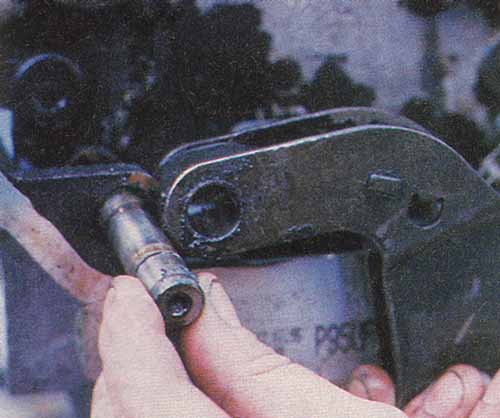
The Tensioner Pivot Pin |
|
Tensioner Parts |
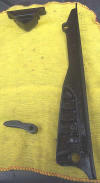
Chain Guide Parts |
| |
|
| |
|
|
|